File Conversion
Some interview recordings arrive in formats that PolygraphReports.com cannot use directly. VLC media player is a free, reliable way to convert those files to MP3 audio you can upload for transcription and report generation.
When conversion is needed
Exported video or audio from body-worn cameras, in-car systems, agency evidence portals, and other restricted or proprietary platforms often uses formats or containers that are not supported for direct upload. The same applies to proprietary DVR exports, witness-interview room systems, and files copied from evidence-management tools that wrap media in non-standard extensions.
Converting to a standard MP3 file gives you a smaller, widely compatible audio file that works well for transcription while preserving the spoken content you need for your report.
Install VLC
Download and install VLC from the official VideoLAN site before you start. VLC is free, open-source software available for Windows, macOS, and Linux.
Convert a file to MP3
The steps below use VLC's built-in converter. You can convert video files (body camera footage, interview room video, etc.) or audio-only exports—the process is the same.
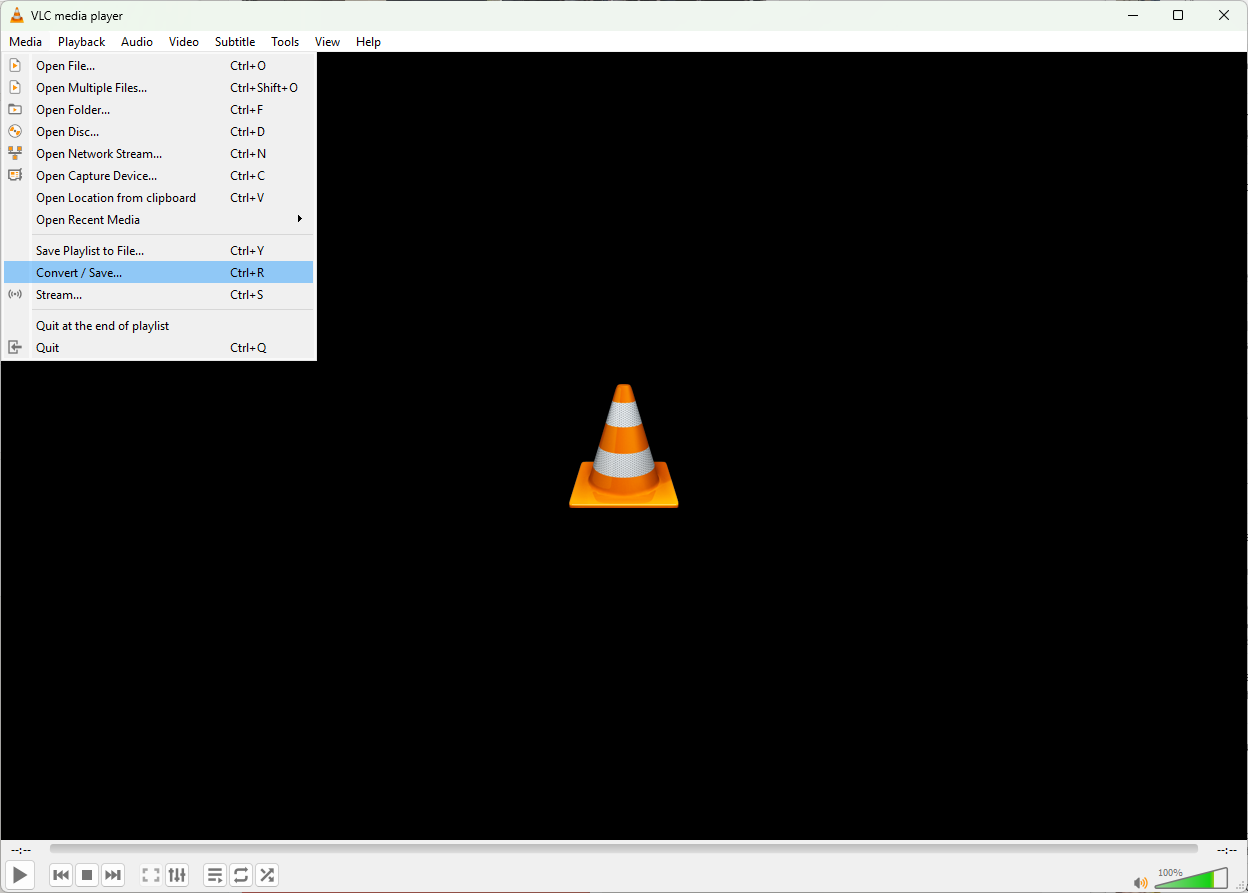
1. Open Convert / Save
In VLC, open the Media menu and choose Convert / Save... (keyboard shortcut Ctrl+R on Windows).
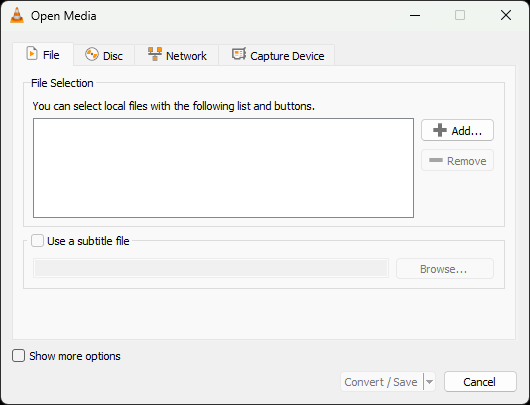
2. Add your source file
In the Open Media window, stay on the File tab and click Add... to select the video or audio file you exported from your body camera, evidence system, or other source. The file appears in the list when added.
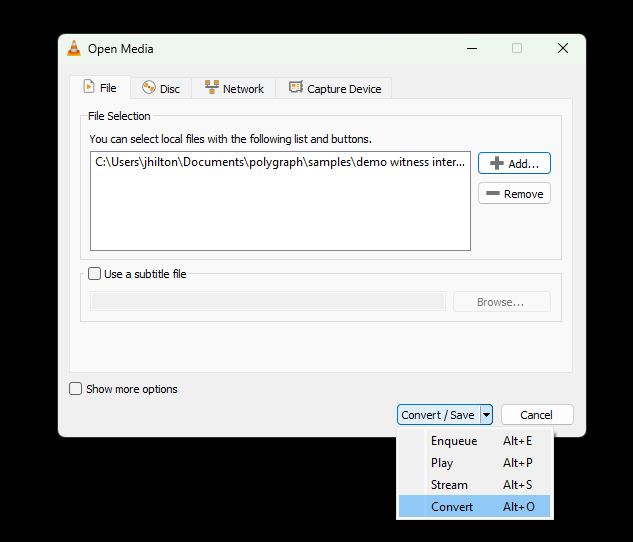
3. Start the converter
Click the arrow on the Convert / Save button at the bottom of the window and choose Convert (not Stream or Play).
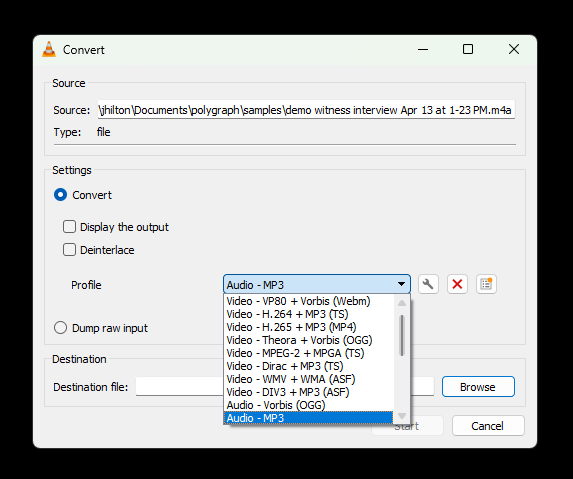
4. Choose the MP3 profile
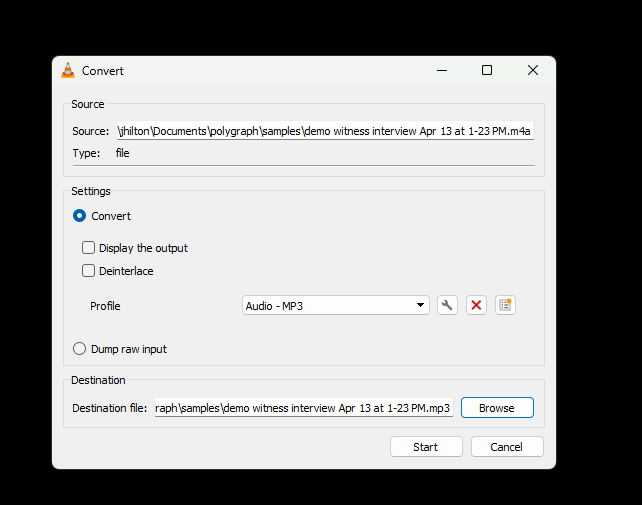
In the Convert window, confirm Convert is selected under Settings. Open the Profile dropdown and select Audio - MP3.
5. Set the destination and start
Click Browse next to Destination file and choose where to save the output. Name the file with an .mp3 extension, then click Start. VLC shows a progress indicator while it converts; when it finishes, use the new MP3 when you upload files to PolygraphReports.com.
Tips
- Keep a copy of the original export from your body camera or evidence system; conversion should not replace your archival master file.
- If conversion fails, try playing the file in VLC first. If it plays, conversion usually works; if not, you may need an export or codec from the source system vendor.
- Long recordings produce large MP3 files. For very long interviews, consider splitting by session or segment if your workflow requires smaller uploads.